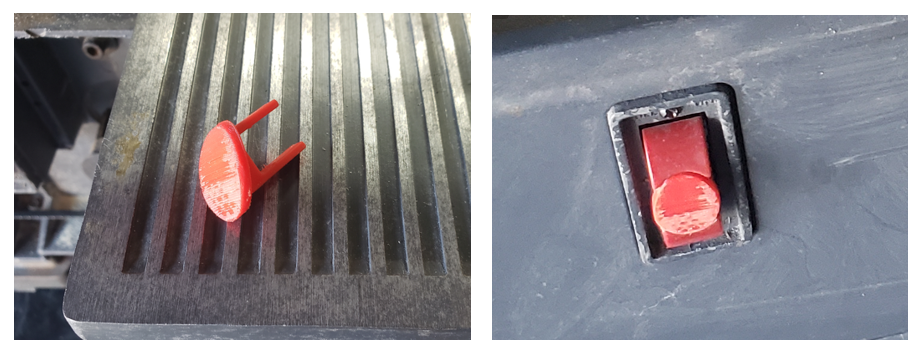
I bought this Craftsman 10" 3-wheel saw in August of 2023 for $10. At the time, it didn't have the switch key or a blade installed, so the owners just sold the unit for salvage.

I found a switch key for Craftsman products on Thingiverse.com (link). I then 3D printed the key in PLA, The key has to be positioned with the "legs" up while printing, and then the support material under the "head" has to be whittled off, but the switch key functions very well, as shown below.

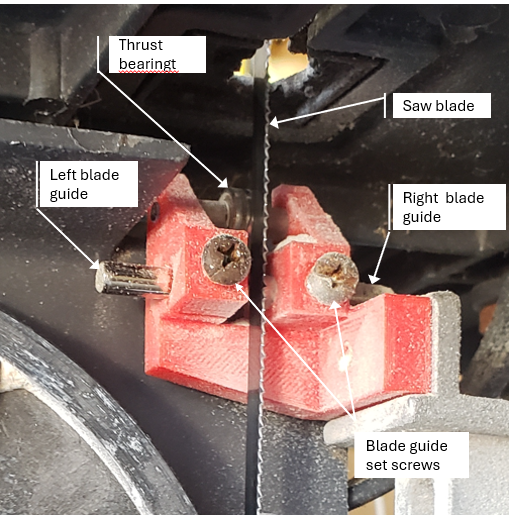
The photo below shows the lower guide after installation. The thrust bearing has a groove in its surface and needs to be replaced.
click to enlarge
The problem with the 3D printed part is immediately apparent as shown in the photo below. The blade guide set screws produce stress that is normal to the 3D printed layers. The part is weak in that direction and the stress causes fractures parallel to the layers as can be seen in the photo.

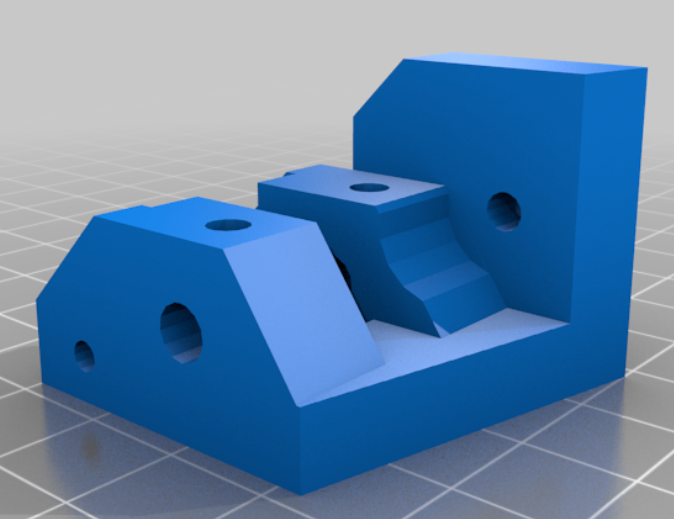
Someone must have experienced this problem and revised the part to be more robust (link). See screen capture below.
click to enlarge

Thrust bearings issues list:
- There is no provision for moving the thrust bearing laterally to center it on the saw blade. The lateral position of the blade is mostly determined by thickness of the bandsaw tires. I don't know how much of an issue this lack of lateral adjustment will be.
- The current bearing is worn with a groove on its surface. I found replacement bearings on Amazon.com (link). They are 3mm ID X 10mm OD X 4 mm wide. I've also found 3mm stainless steel rod to make the axle (link). I haven't yet found material to make the spacers.
- The thrust bearing is difficult to install on the guide. The axle is currently pressed through the guide plastic body. I don't like guessing the proper diameter to get a good interference fit for the axle. Also without some sort of installation jig, pressing the axle stresses the plastic guide body and distorts the part.
My plan for the plastic guide redesign are shown in the sketch below, which is a side view of the guide:
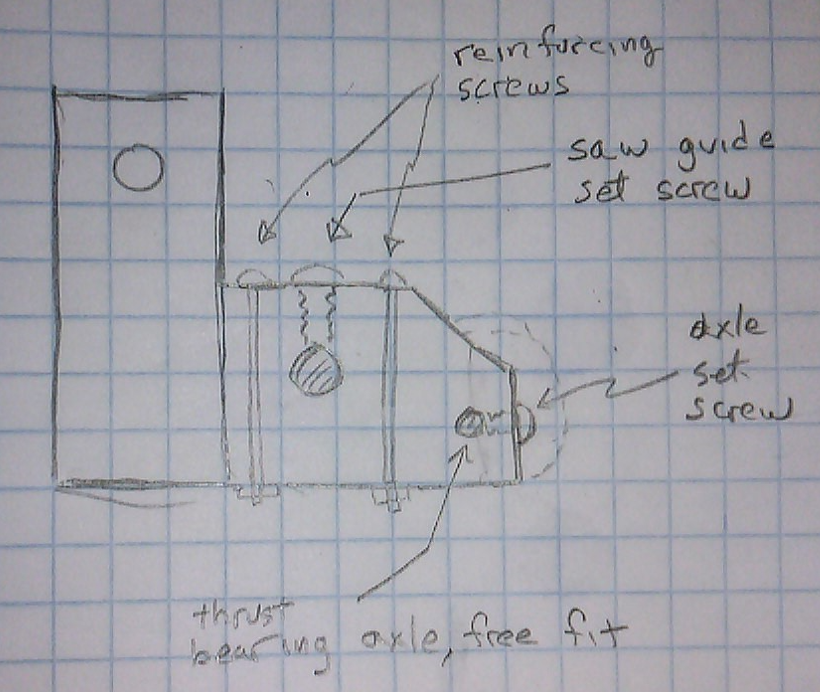
- Extend the material adjacent to the saw guide set screws and add reinforcing screws to prevents cracking of the plastic when the set screws are tightened
- Eliminate the interference fit of the thrust bearing axle and make the holes a free fit. Then add set screws to prevent the thrust bearing axle in place.
- Produce the thrust bearing axle spacers using 3D printing, making their lengths asymmetric to keep thrust bearing centered on the saw blade.
I will import the bearing guide stl file into Fusion 360 and modify it as needed to get a revised part.
No comments:
Post a Comment